Onboarding the Webex Service
This procedure describes how to onboard a new Webex service.
| ➢ | To onboard the Webex Service: |
| 1. | Do one of the following: |
| ● | In the Customers page, select the check box adjacent to the relevant customer and then from the Add Service drop-down, choose Webex Cloud Connect. |
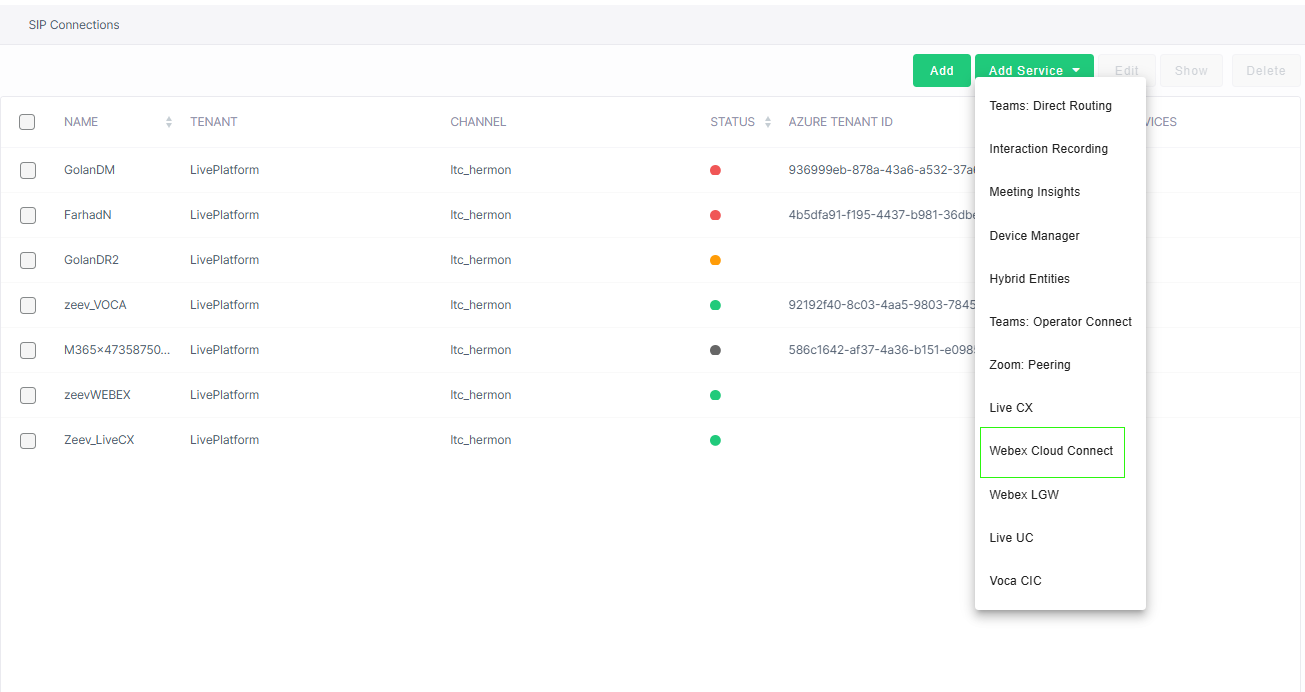
| ● | In the Services page, from the Add Service drop-down, choose Webex Cloud Connect. |
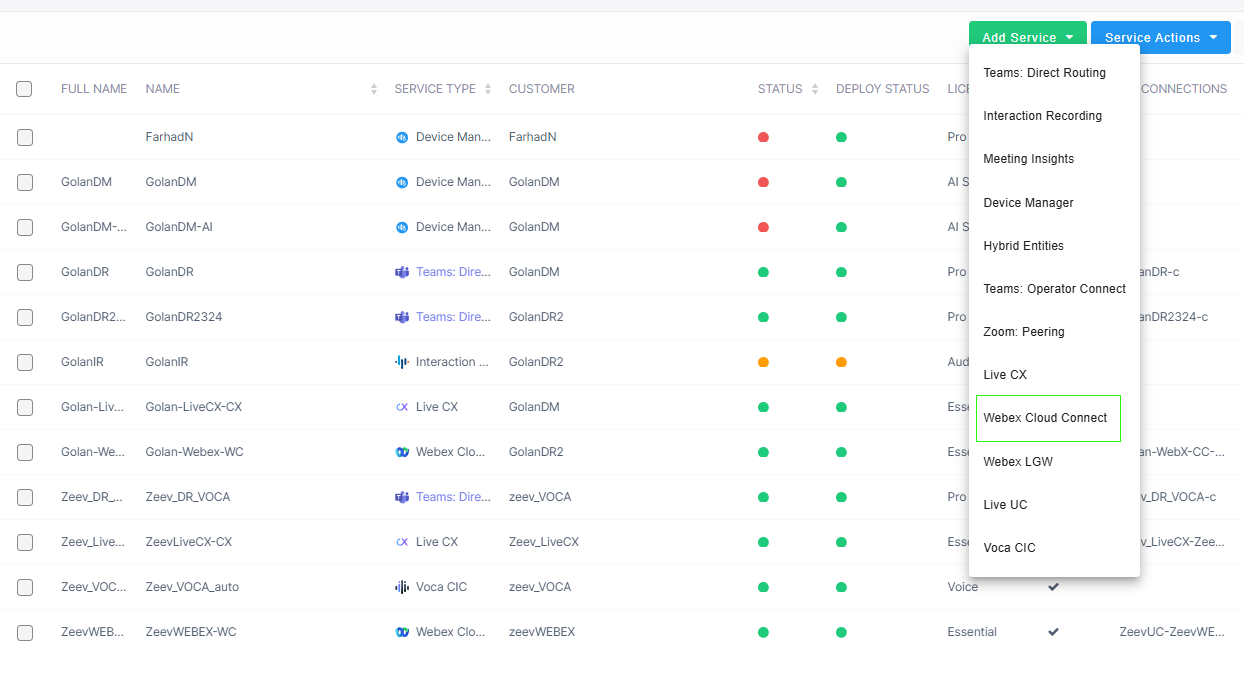
| a. | Select the relevant customer. |

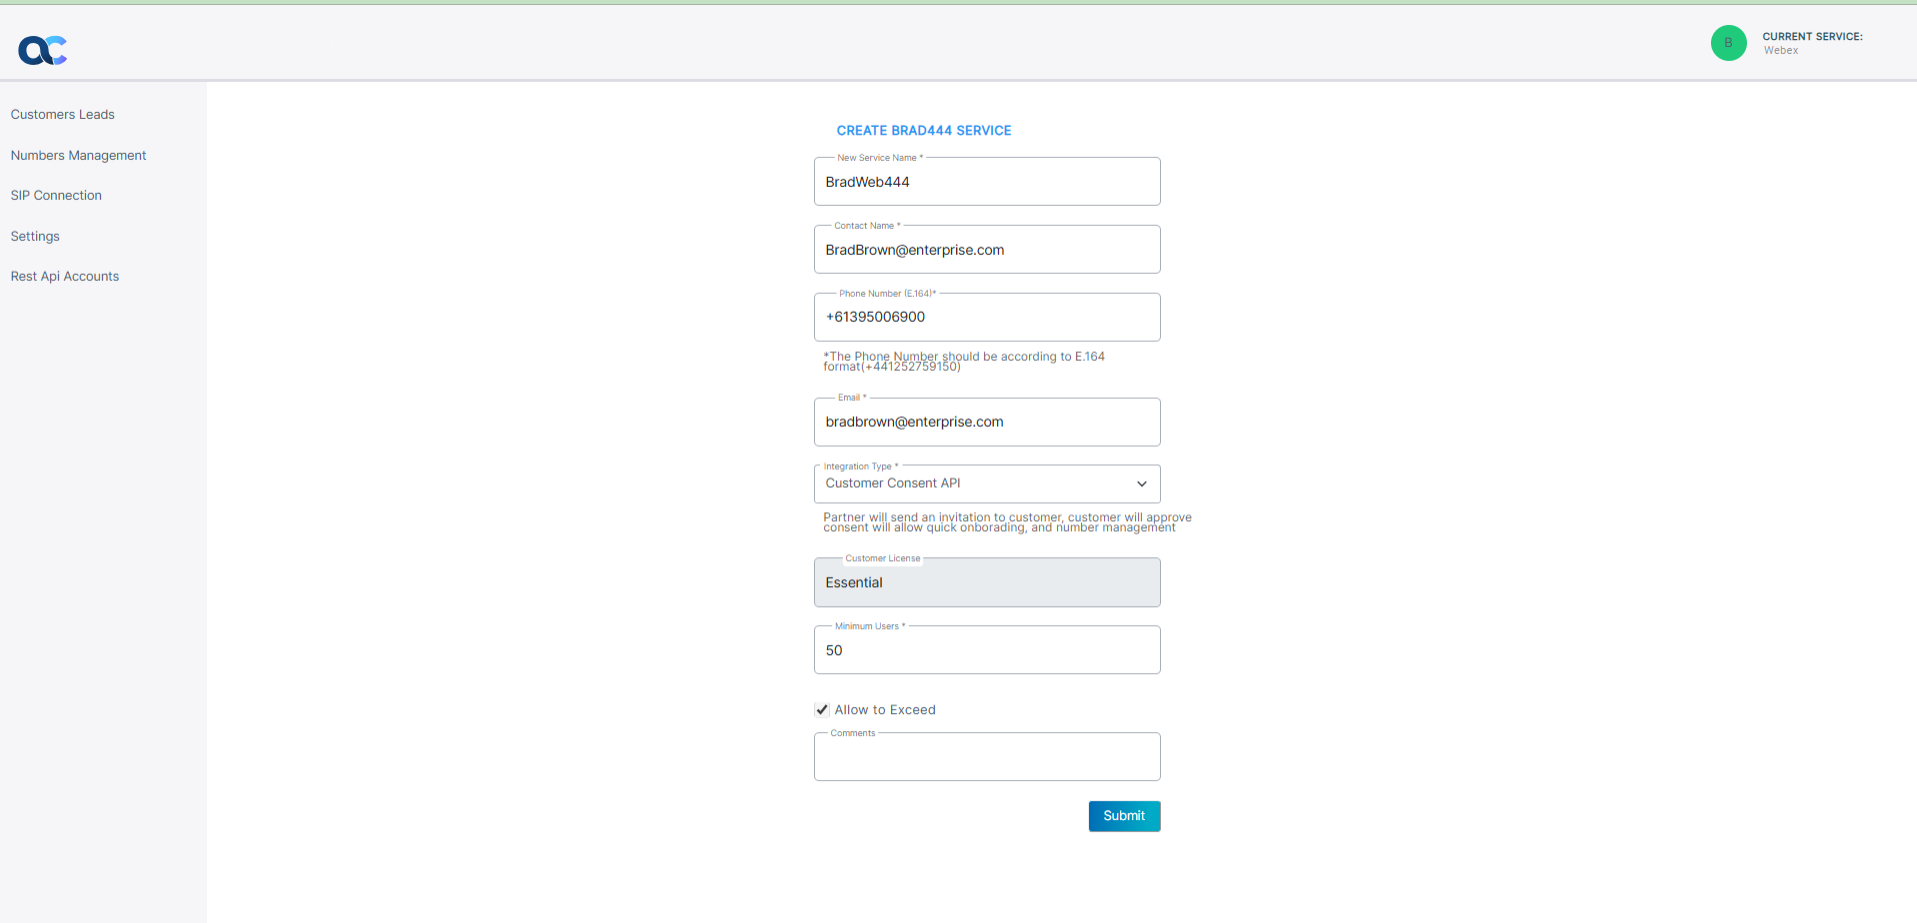
The Onboarding form is displayed.

| 2. | Configure parameters according to the table below and then click Submit. |
|
Parameter |
Description |
||||||
|---|---|---|---|---|---|---|---|
|
New Service Name |
The name of the new service. |
||||||
|
Contact Name |
The name of the contact. |
||||||
|
Phone Number (E.164) |
The phone number of the M365 tenant admin. |
||||||
|
|
The email of the M365 tenant admin. |
||||||
|
Integration Type |
|
||||||
|
Webex Organization ID |
The ID used by the M365 tenant in the Webex interface. |
||||||
|
Customer License |
The license type for the service. Default: Essential |
||||||
|
Minimum Users |
The number of M365 tenant users that are managed by the service. |
||||||
|
Allow to Exceed |
Indicates the number of users managed by the service that can exceed the Minimum Users without affecting the service. |
||||||
|
Comments |
Free text notes. |